Monday, April 19, 2010

Ten Trendy Tree Cards


You don’t have to be Tarzan, a green thumb, or even a tree hugger to love the trendy look of trees on paper crafts. This hot design accent is all over in products and super fun to work with, so I was delighted when my monthly card group was given an April theme of cards with trees on them. Take a look at the awesome ideas that *ahem* branched from this playful prompt.

P. Kelly, our card group queen, went with a subtle tree look, using this sweet house-lined paper from American Crafts.


And Kelly wasn’t the only one drawn to the subtle tree-lined street. Beth also created using this sassy paper. I love how different these cards are, even though the product used is so similar.


Becky built a tree of love on her card by stitching a bunch of punched hearts to her tree. She also did a zigzag stitch for her grass, which is adorable!


Brady also added a dash of stitching to his card. And isn’t that bitty button tree the cutest?


Speaking of buttons and trees, check out the funky bubble tree Brandy created. The big button adds the perfect finishing touch!


Tracy went with a tree trio. I really like how her darker color scheme helps balance out this mix. It’s a nice change of pace and a very attractive card.


Sara also did a darker color combo. I like the addition of twine. It really works well with the earthy feel of the theme.


Jennifer planted a bitty tree on her card, which she stamped and cut out. I love the clean simplicity of her design!

Roxanne also stamped to create her swirl tree, and she even gave it a happy birdie inhabitant.


To round out our collection, I, too, stamped to create my tree, using a stamp from Unity Stamp Co. I then colored in the different leaves with Copic markers and added an embellishment or two to top it off.

This was my original design, which had baker's twine for the swing. Oh, and that way dang cute owl stamp is from Paper Source. Love that store!

It only took making one like this to realize that it would take way too long to do 12, so I switched to a stitched swing.


The final outcome looked a little something like this, minus my sloppy, handwritten "Swingin' by to say hi" sentiment. I'm not a huge fan of my handwriting, so I left it off of most of my cards.

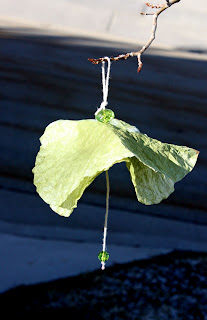
BTW, I should apologize for my sub par photography. I thought I’d be all creative and shoot these cards in an actual tree, so I took them out front and perched them in my yard. Yeah, the idea was fun, but the lighting and shadows made it a challenge. So much for thinking outside of the light box. ;)


I hope this post has planted a few fun ideas in your head. Cheers!

Tuesday, April 13, 2010

Fun with Coffee Filters (part 3): Lanterns and Umbrellas

Ready for the third and final installment of my coffee-filter fun? Well, the third installment for now, that is. This time, I used my color-misted filters to create faux Chinese lanterns and little paper 'brellas.

Filter Lanter
For the lantern, simply knot a piece of thread and add a few coordinating beads.

Then, thread on your coffee filters. The natural shape is perfect for creating the look of a lantern.


Add another bead or two to the top of the filter stack, tie a knot and hang your creation.


Filter 'Brellas


For the umbrellas, tie a knot at the end of a string and thread a bead for your handle.

Tie a second knot, add a second bead, and then thread two colored filters. Top it off with a top bead and tie the string with a knot. Don't be afraid to fold the filters a bit to form an umbrella shape.
How fun would these look as shower decor, either for a baby or a bridal shower?

Hope you've enjoyed my filter creations. I'd love to know which (from all three posts) is your favorite.

Thanks for taking a peek!

Friday, April 9, 2010

Fun with Coffee Filters: Bold Butterflies (Part 2)


Time for another coffee filter craft. This time I used some old funnel-looking filters Cory had in our cupboard to make butterflies like these.

Here's a side-by-side comparison of regular filters vs. funnel ones so you'll know what to look for. The first filter (with the beads in it) is a regular, circular filter. The ones below it are the ones you'll want for this project.

Let’s make some filter butterflies. It’s easy. Here’s what you’ll need for this one: funnel coffee filters, spray mist, a hole punch, string, beads, pinking sheers and adhesive.

Just like with the garland and the banner, you’ll first mist six funnel filters.

Once dry, I fold the filters into fan shapes.

Adhere two sets of two filters together. Doing this, you should now have four wings. The smaller, single ones will be the top wings and the two glued together will be the bottom wings.

Punch a hole in the center of each wing group.
At this point, you can either leave the full wings, or you can create a smaller butterfly by trimming the wings. I used pinking sheers for a fun decorative edge.

Knot the end of a piece of string and thread three beads for the butterfly body.

Thread on the wings and add one more bead for the butterfly head. Pull the butterfly together tightly and secure the butterfly with a few knots. Then loop the rest of the string to have something to hang the butterfly with.

At last, the metamorphosis is complete. You have a butterfly!
Hosting a spring get-together? Create a bunch of these and hang them from your trees or from spots in your home. These would also look cute as spring décor if you created several of them and strung them in your front window.

Join me on Tuesday when I share my third and final coffee filter installment… well, for now.

Thursday, April 8, 2010

Fun with Coffee Filters (part 1)


Wanting to add some color to this dreary wing (aka winter-spring) we’ve been having here in Utah, I spent part of last Saturday playing with coffee filters. Yeah, that’s right, coffee filters. Well, filters and spray mist. The result: several different projects. I decided to post them here in case you’re looking for a little color this wing, too.

Coffee Filter Project #1: Banner
I made this for my family’s Easter celebration. I love the bright colors.


Creating this one is simple. Just spray circular coffee filters with spray mist (I used Glimmer Mist from Tattered Angels) and allow them to dry (takes about 10 minutes). With each color, keep one crisp and crumple up the second one. Then, layer the crumpled one over the straight one and attach letter stickers.


On the ends, I crumpled and stapled together a sprayed filter to create flowers.


Once your pieces are all put together, clip them on a string for a fun and easy banner!


Coffee Filter Project #2
I used a few of my extra colored filters to create a bright, spring garland. This time, I threaded the filters in color groupings on the string.


You don’t have to be a coffee drinker to do this craft on the cheap. I bought an entire stack of circular filters from the dollar store for, yes, you guessed it, a dollar. Excellent! Enjoy the filter fun and check back on tomorrow for another idea.

Sunday, April 4, 2010

DIY Floss Spheres


You know those textured spheres that are all the rage right now in home décor? Well, thanks to an idea my sweet hubby shared with me (something he learned from his talented mama(, I now know how to make them. This would make a fun Easter evening craft tonight, or you can do them anytime. Let’s get started!

Supplies:

Embroider floss
Balloons in various sizes
Sugar water
A few damp cloths (this gets sticky!)

Instructions:

Step 1: Mix 1 part sugar with 1 part water to create a paste.


Step 2: Dip embroidery floss into sugar water. (I used 8.75 yards of floss for a small circle. It takes at least twice that amount for a larger circle.)

Step 3: Blow up a small balloon. (I used water balloons for my small circles, and I didn’t blow them up very much.)

Step 4: Wrap the wet floss around the balloon in all directions, making sure the floss stays nice and wet as you go.

Step 5: Allow the floss-wrapped balloon to dry overnight, and then pop it, removing the balloon remains from the circles inside.

Because the sugar water is sticky, the floss dries stiff, which allows it to keeps its form. Cool!

Bonus Idea
If you’re looking for a fun Easter craft to do with the family this evening, make these circles in several colors and use them as egg décor. Using the same sugar water, I also made a paper mache nest for my floss eggs. Here’s how:

Step 1: Tear pieces of newspaper, dip them in your sugar water mixture, and wrap them around a larger balloon.

Step 2: Once the balloon is wrapped, allow it dry overnight.

Step 3: Remove the nest from the balloon and fill it with your floss eggs.


I loved this project and will definitely make more floss spheres to put in a dish on my coffee table. It’s inexpensive, easy and fun! I hope you’ll give it a try.

Thanks for the awesome idea, Cory and Lorna!

Friday, April 2, 2010

Color Your Eggs with Creativity!

Move over, dye. Coloring Easter eggs just got a lot more creative and fun. Last year I shared these eggs, which my family and I dressed with rub-ons and glitter glue.


After the fun I had last year, I decided to explore the art of crafting eggs again this year. Here are a few of the colored creations I came up with:

1. Bring on the Buttons
I used dots of glue to attach bitty buttons to a misted egg. (The color on the egg is from spray mist, a scrapbooking supply.)


2. Pom Pom Pretty
It was dots of glue to the rescue again. This time I used them to adhere jumbo pom poms. This idea would also be sweet with bitty poms.


3. A Bling Dream
I adore self-adhesive rhinestones. This egg was wrapped with a bling belt and is so ready for a night on the town!


4. That’s a Wrap
I stuck a strip of glue to one side of the egg and then wrapped it with embroidery floss. This would also work with yarn.


My egg addiction followed me to work, where Joannie McBride and I dressed up eggs with spray mist, rub-ons, flock, and more! You can check out the ideas we hatched by visiting the Creating Keepsakes blog.


Are you decorating eggs this weekend? What’s your favorite way to shine those shells?